On this page
You need one LoungeOS account per person. The owner creates it first, then adds the team. The account works on the web app, the Windows and Mac apps and the Android phone app.
1. Create your account
- Open app.loungeos.app.
- Sign up with your email and a password, or press Continue with Google. Sign-up is on the same page as sign-in.
- Confirm your email if you are asked to.
Your free trial starts when you finish the setup wizard below: 14 days with the Business plan features, no payment up front. You choose a plan and pay at account.loungeos.app when the trial ends, or earlier. See Plans, billing and the free trial.
2. Answer the three questions
The first screen of the setup wizard asks three things:
- Business name. It prints on receipts and reports.
- Country. It sets the currency (FCFA for Cameroon, naira for Nigeria, cedi for Ghana and so on).
- Your mobile number. Pick the country code first, then type the number. It is saved to your LoungeOS account so we can confirm it’s you and help you get started. It is never shared.
Then tap every kind of business you run. A lounge that also serves food picks both Lounge, bar or nightclub and Restaurant. The kind of business decides which screens you start with: tables, kitchen and bar screens for venues, Products instead of Menu for shops.
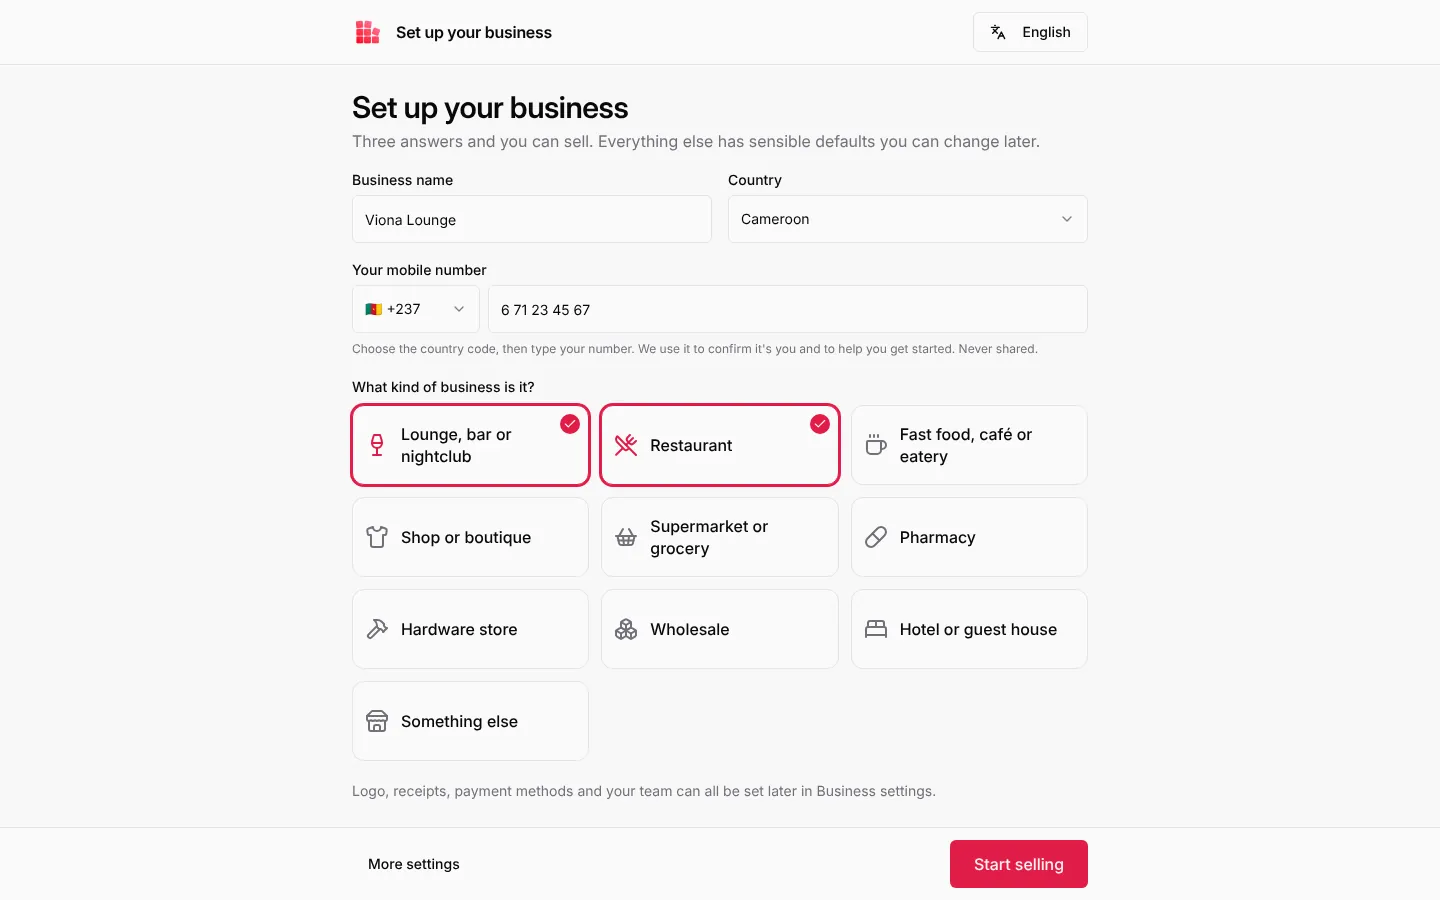
Press Start selling and you are done. Or press More settings to go through the six other steps now.
3. More settings (optional, 6 short steps)
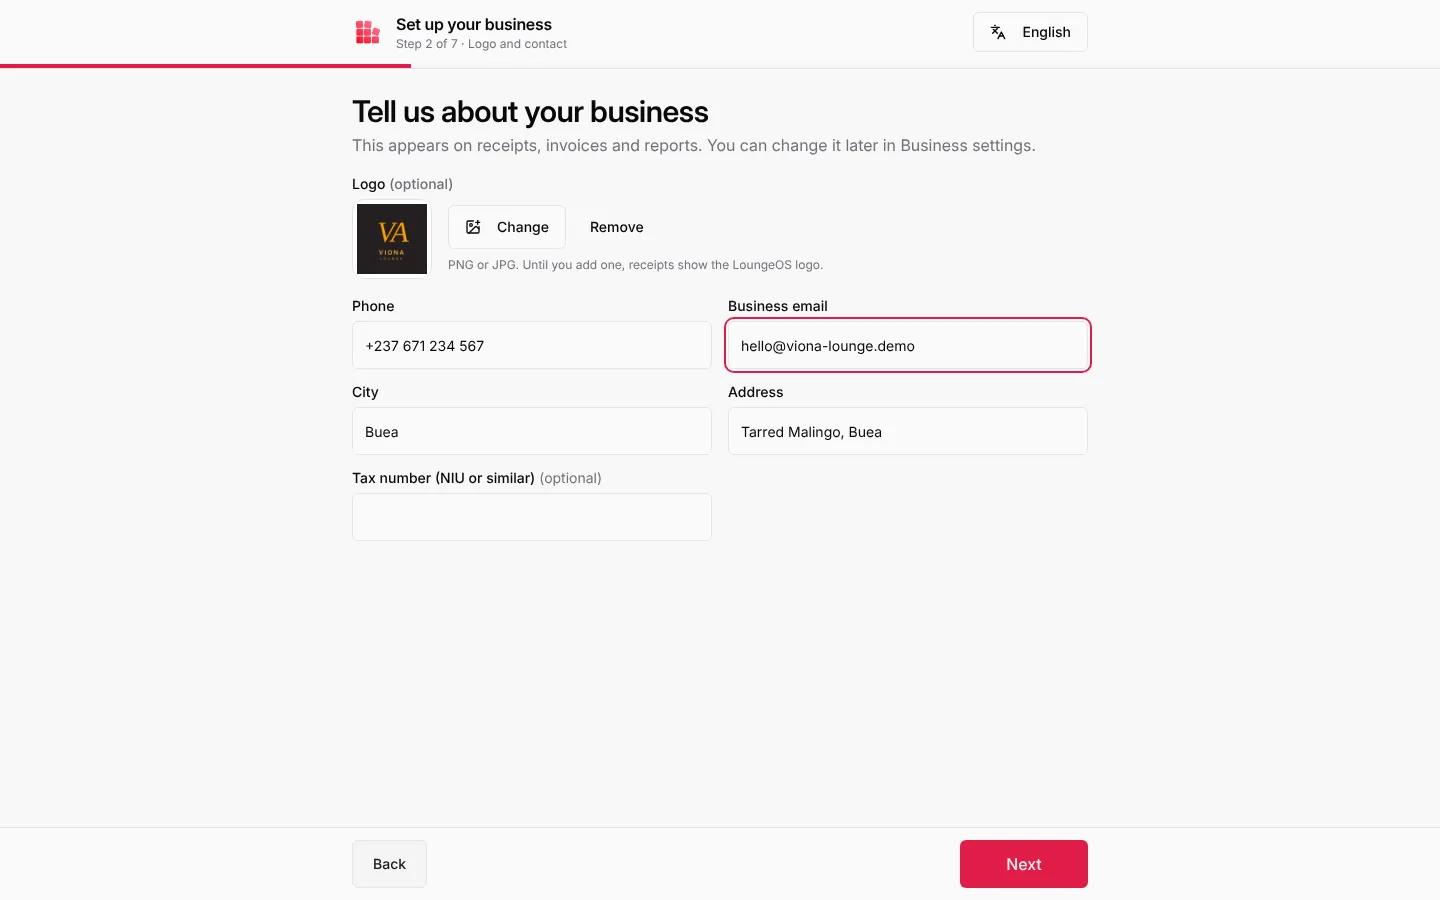
Logo and contact. Upload your logo (PNG or JPG; until you add one, receipts show the LoungeOS logo), and fill in the business phone, email, city, address and tax number (NIU or similar).
Screens. Sales, stock, staff, reports and accounts are always on. Turn Tables and floor plan, Kitchen screen, Bar screen and Events and tickets on or off.
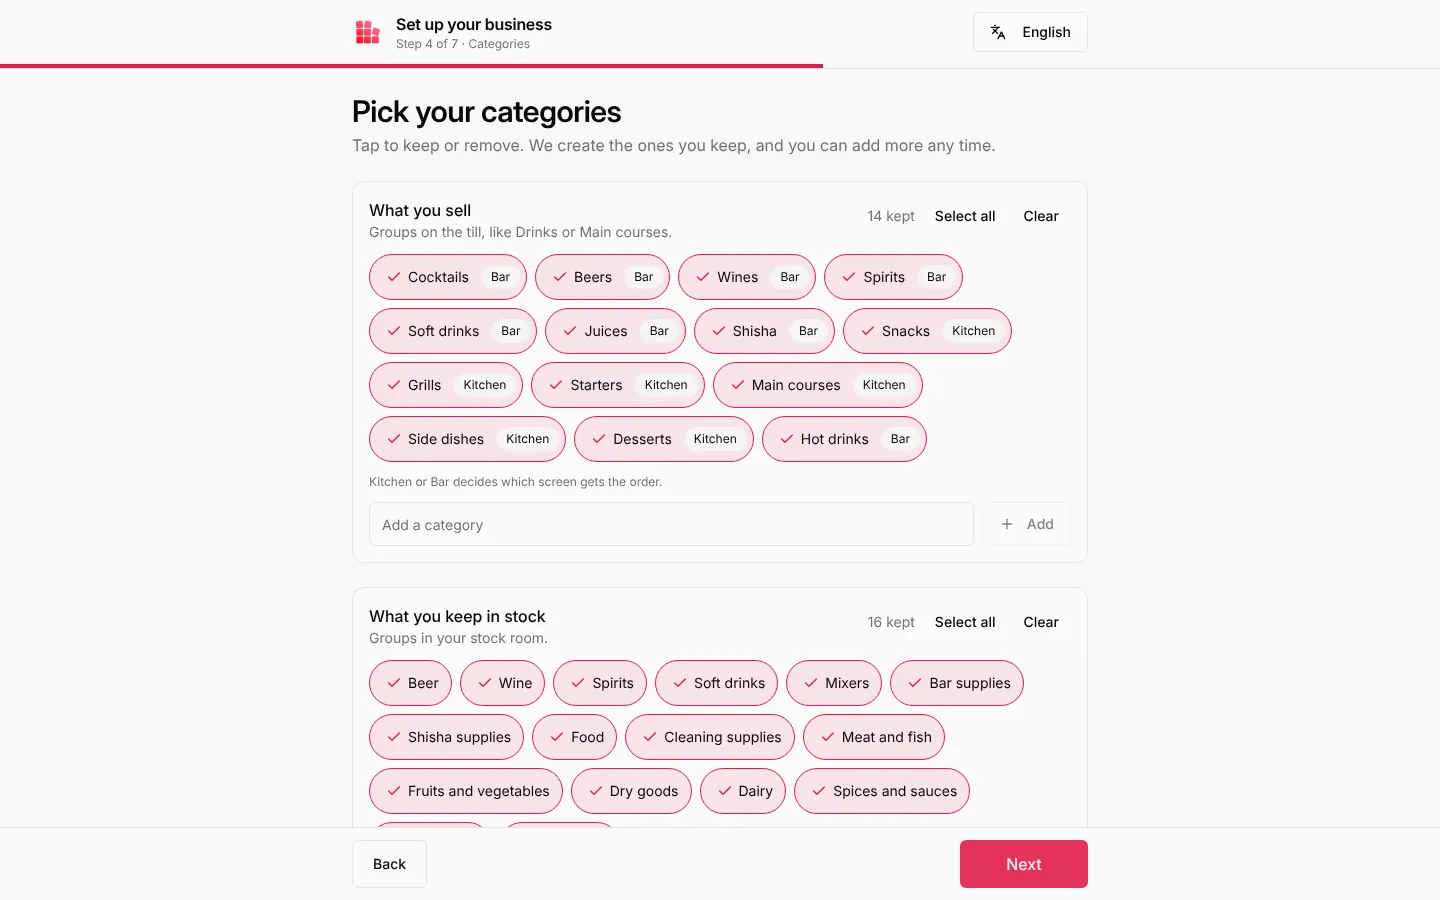
Categories. Tap to keep or remove the suggested categories for what you sell and what you keep in stock. Each selling category goes to the Kitchen or the Bar: that decides which screen and ticket printer gets the order.
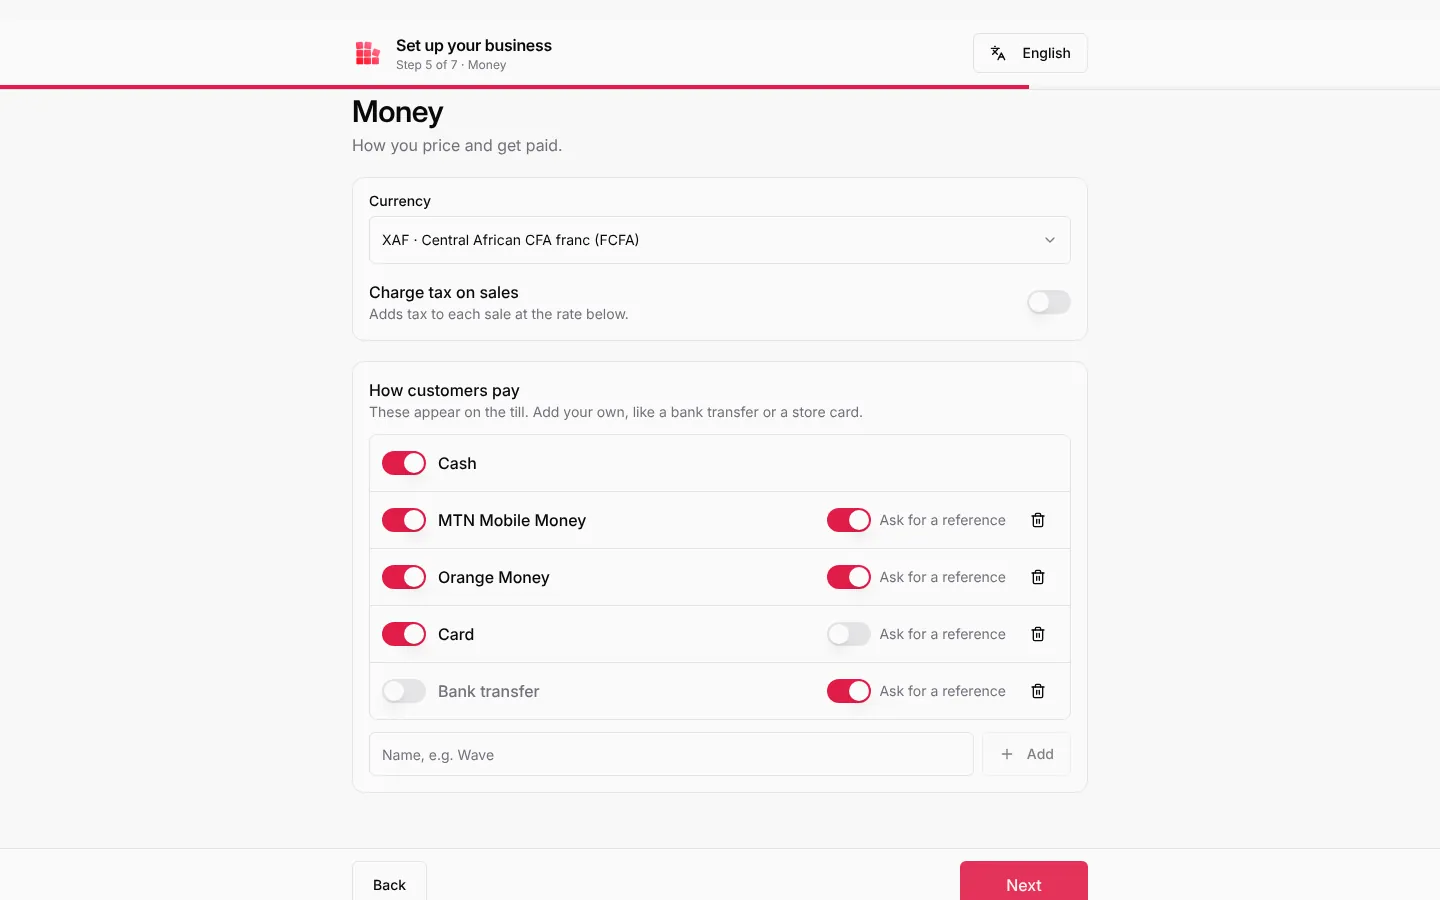
Money. Check the currency, turn tax on only if you charge it, and keep the payment methods you take: Cash, MTN Mobile Money, Orange Money, Card, Bank transfer, or add your own. Ask for a reference makes the cashier type the transaction number (useful for mobile money).
Receipts and business day. Pick 58 mm or 80 mm for your receipt printer, add a message for the bottom of receipts, and set when your business day ends. With 04:00, sales after midnight still count for the evening before.
Your team. Add the people who will use LoungeOS. You can also do this later in Staff (see Add your team).
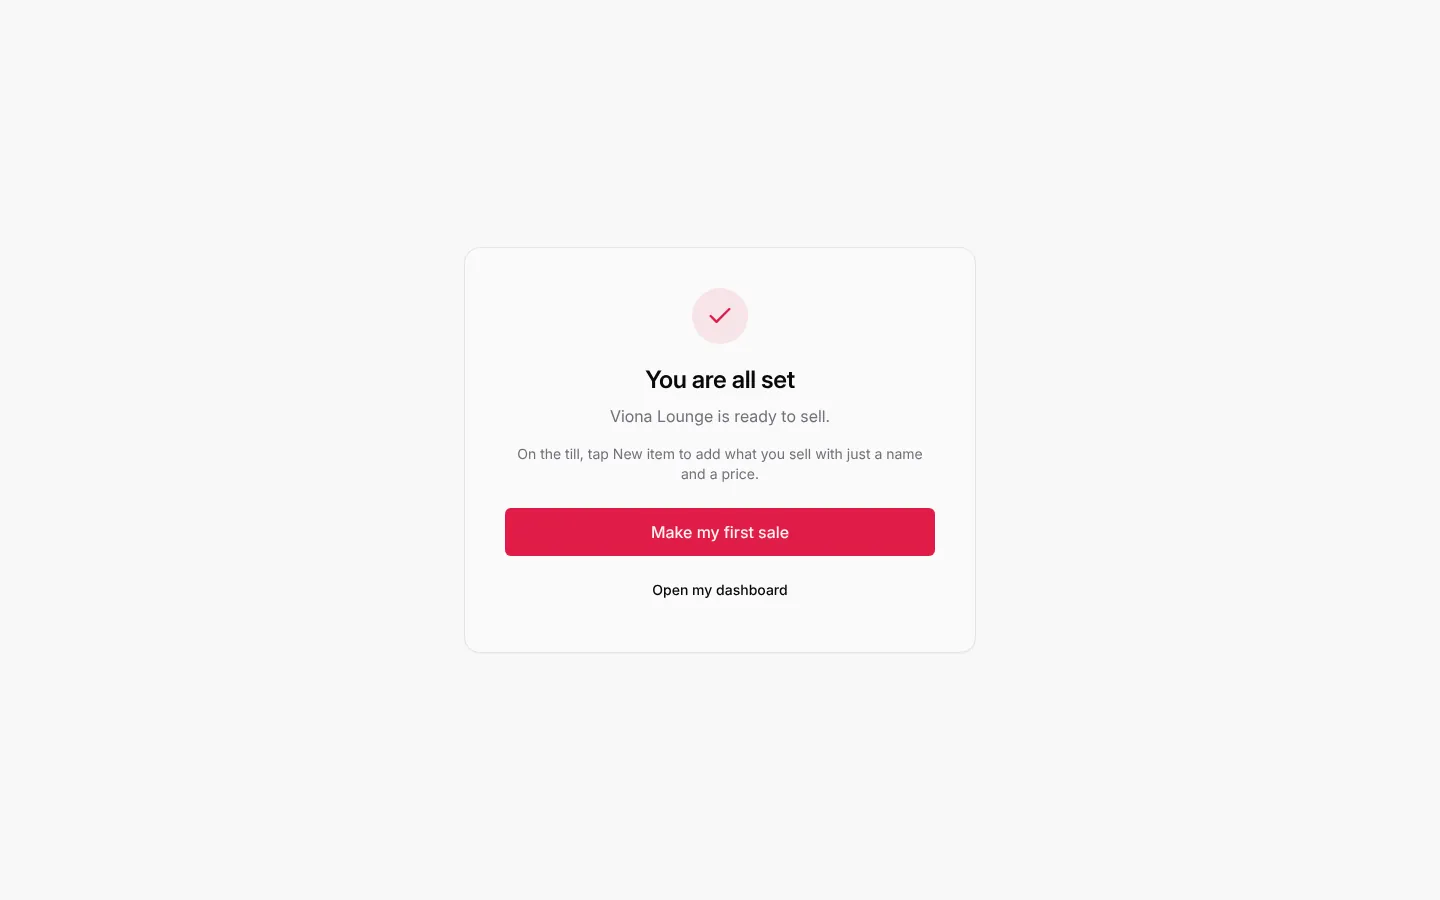
Press Finish. LoungeOS says You are all set and offers Make my first sale or Open my dashboard.
What to do next
- Add your products and categories, with photos and prices.
- Set up tables and floors if you serve at tables.
- Install LoungeOS on your till computer and your phone.
- Make your first sale.
Every answer can be changed later in Business settings (the cog at the bottom of the side menu).
Frequently asked questions
Do I need a licence key?
No. There are no keys or codes to buy. You sign in with your LoungeOS account and your plan follows the account.
Can I change the business type later?
Yes. In Business settings, General, you can turn screens such as tables, kitchen and bar on or off at any time.
Why does LoungeOS ask for my mobile number?
To confirm it’s you if you lose access, and so the team can help you get started on WhatsApp or by phone. It is never shared or shown to others. On a till it also prints on receipts as the business phone until you change it.
Stuck on a step? Write to support@loungeos.app or WhatsApp +237 679 690 703 and say which page you are on.